Recently during my stint as a Teach For India Fellow, I have been building
Community Computers for use at my school. These involve creating an easy to carry box with projector, computer, speakers and wirless keyboard/mouse all stuffed in. After building one based around
Intel NUC PC I decided to think of ways of decreasing cost of the Community Computers and make it more user friendly for our not so tech savvy teachers. Towards that, I thought of using an old non-HDMI VGA projector paired with a Single Board Computer
APC 8750 which runs Android OS and has a VGA video output which makes pairing with an old projector possible..
If you think about it, a computer that runs Android would be more successful with teachers as compared to a Windows based PC. Teachers now days have access to smart phone so that are already comfortable with using Android. If you install appropriate apps on an Android based community computer, they can play all kind of content - videos, photos, PDFs etc. Also Android based SBCs boot fast and you don't really have to worry about viruses.
The APC 8750 supports playing of Videos and Photos from a USB flash drive that you plug into it. Here is what the result looked like:
If you notice, there is a small box with colored switches next to the wireless mouse. That box is actually a full fledged wireless keyboard hacked down to retain just the 4 arrow keys along with Esc, Space bar and Enter keys - because those are the only keys that you need to operate the Android OS on APC 8720 for playing videos and photos. It has proven to be a good idea because carrying a cumbersome keyboard to class when you only want to show videos and photos is not such a good idea. Big keyboards are prone to damage in a chaotic classrooms.
Here is how I went about hacking the
Logitech MK220 wireless keyboard and mouse:
Step 1: Open up the keyboard and separate out the parts:
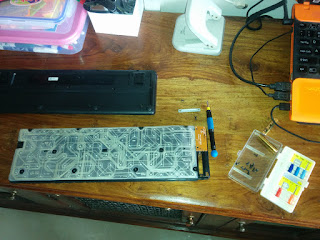 |
| You can see the back side of the transmitter circuit and key membrane |
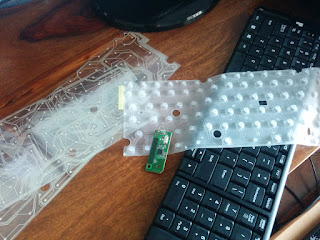 |
| Keyboard membrane (the one with silver traces on it), pressure pads sheet (made of rubber) and the transmitter. |
Step 2: The membrane separates into two sheets - Top and Bottom. So the next step was to scan the sheet so as to highlight the traces for the keys that I wanted on my compact new remote. Since the length of the membrane sheets was more than what would fit in my A4 sized scanner, I had to perform the scan twice from both ends of the membranes and join the two images. While scanning the two images, I placed a black folder as their background to ensure that there was contrast between the traces of the membrane and the background which would otherwise have been white due to the white sheet usually stuck on glass facing side of the scanner lid.
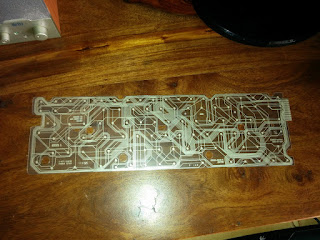 |
| Two sheets of the membrane lying on top of each other |
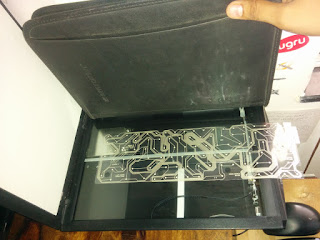 |
| Black folder providing contrast while scanning |
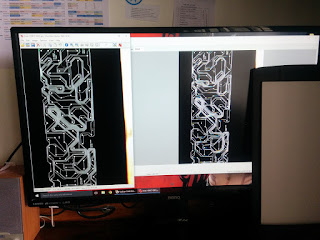 |
| Scanning in progress |
 |
| Scanned the membranes from one side... |
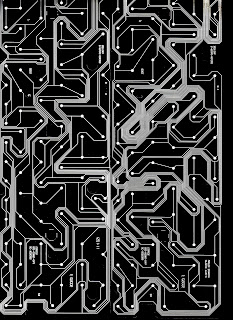 |
| ... and then from the other side because they did not fit all together at once in the scanner |
Step 3: Next, I used Microsoft Paint to join the images. Then I used IrfanView to decrease their color depth to 2 colors (black and white) and then back to 16 million colors. This ensured that the contrast for the image had been maximized (each pixel was either white or black) and that I could now use the paint bucket tool of Microsoft Paint to trace the tracks on the images. The tracks were white and the background was black,
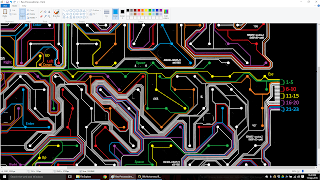 |
| Decreasing the color depth (IrfanView) and then increasing it again (Microsoft Paint |
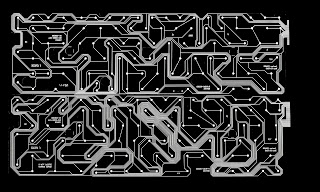 |
| Joined image. Decreased to depth of 2 colors only. |
Step 4: Finally use the paint bucket tool to trace the tracks to the pads of keys of interest on the top as well as the bottom layer of the membrane. Then match the connecting pins to the pads on the keyboard transmitter PCB and make a list of what to pads on the transmitter PCB correspond to pressing of which key.
Step 5: Finally mount tactile switches on a PCB and assemble your own circuit for the wireless remote control. Solder wires from these tact switches to pads on the transmitter PCB corresponding the keys that the new tact switches need to proxy. Fit them all in a small door bell box, add batteries, close the box shut and you are done.
NOTE: Here is
the list of various other Community Computers that I built using various other projectors and single board computers over the few months of my fellowship.


Comments
Post a Comment